How to document your database
The following is an overview of the process with Database Note Taker.

Connect to your database and refresh
Create a new project in Database Note Taker, first choosing the kind of database you are connecting such as Microsoft Sql Server, and then specifying connection details and other settings. A refresh will then import the schema information for you to review.
Document your database objects

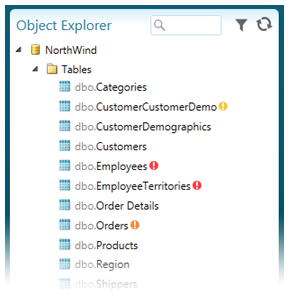
After a refresh your database objects are organised in the Object Explorer. Objects which do not have complete documentation are indicated with an icon; red indicates no documentation at all, orange and yellow indicates a degree of documentation.
A search box filter allows you to show only the objects you are interested in or find a specific object quickly and there are filter options to include only objects with missing documentation.
These simple filtering options enable you to introduce effective documentation processes. When there are additions to your database, developers need only refresh in Database Note Taker and then filter for missing documentation to see where to record notes about the changes.
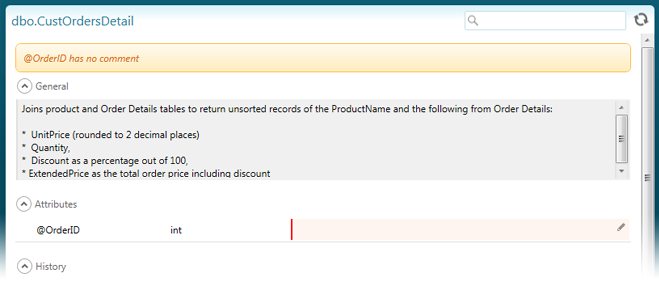
Selecting an object in the Object Explorer allows you to see and edit the documentation:

The edit interface indicates missing comments and allows you to record notes against the object and it's attributes. Notes can be written using Markdown syntax which enables formatting of published content while being source control friendly.
Publish and share
Using XSL, Database Note Taker publishes to html ready for you to share. To give you flexibility you can define your own XSL stylesheet.

Tracking changes
You can let Database Note Taker track changes. Or you may prefer to disable history tracking in Database Note Taker and instead use your source control system for tracking changes. Database Note Taker stores your database documentation in source control friendly xml files and you can optionally store one xml file per object.